sreda, 24. december 2014

Tilda In Cozy Coat

Hi everyone!
I'm back.. With a new card..


My father needed a Christmas card and I had NONE.. 
Seriously..
I was in such a hurry that I forgot a thousand things..

I forgot to finish everything with Gesso.. I can't believe it.. I only realized it while editing the pics..
And a pearl fell off..
Wanna talk about the colouring?
I forgot to finish the shading around her..

Shame on me.. LOL!
Well.. There's nothing I can do now.. He mailed it out earlier today.. 

Enough with the babbling..
Here are all the details..


This gorgeous papers are from Magnolia.. I've been neglecting them lately but I'm starting tu pull them out of the drawers..
And I've decided to use some dies from the Doohickey Kit vol.2 too..
Can you spot them?


One of the Slender Firs is there too..
And I've used my GoKreate dies for the card's shape and my Spellbinders dies for the image..
At least I did not forget to distress and sew the edges..
There's a doily under there and a square piece of corrugated cardboard that I painted with some Picket Fence Crackle Paint..


Some pearls here and there..
A snowflake charm..
And some beautiful lace..


Tons of flowers from Wild Orchid Crafts, Kort & Godt and Magnolia.. Of course.. 
And some berries, leaves and a bit of cheesecloth..
The snowflake die from the kit is pretty much all hidden under all that stuff..


This cutie from the Waiting For Christmas Collection 2014 is called Tilda In Cozy Coat..
The dots around her are made with Chunky White Frantage and the snowflakes are covered with Stardust Stickles..
I added a touch of Glossy Accents to the buttons on her coat..
She's coloured with Distress Inks..
Just a few colours really..
But I've added a bit of Aged Mahogany to the cheeks this time, and you know what?
I really like it!!


I would love to hear what you guys think..
Leave me a comment if you can..

And there's one more thing I have to say:
Merry Christmas to you all!!!

Hugs, Tina

četrtek, 18. december 2014

Tilda With A Big Big Rose

Hi there!

I want to share with you a card that I made recently..
I've used one of my favourite stamps from the Pink Lemonade Collection 2014..
Tilda With a Big Big Rose..


The papers are from Pion Design and Magnolia and I've used one of my GoKreate dies for the card's shape..
The doily and Vintage Seam Binding are from my stash..


Here's the Tilda Tag Doohickey that I just can't stop using..
And you can also see the gorgeous Pins that I've added..
There are some pearls here and there too..


The layer of Magnolia paper under the image was cut with a Spellbinders die..
You can see lots of WOC and Kort & Godt flowers on this card too..
And a super cute charm and a lovely Bark Heart with some cheesecloth and a little flower on..


The hearts around the image were also made with my beloved Magnolia stamps..
And another thing I love to add on my projects are the flower sprays..
The paper edges are distressed and machine sewn..


Of course there's some gorgeous lace too..
And I've used one of my Magnolia sentiment stamps and a small Wooden Spool to add it..
I've added some Chunky White Frantage here and there and some Gesso..


The image is stamped on my fave 300g aquarel paper and coloured with Distress Inks..
I've also added some Stardust Stickles on some parts to add that extra sparkle that I love so much..
The dots around the image are made with Frantage..


Any questions?
Feel free to ask.. I'm always here if you need me.. LOL!

I'm entering this card into the following challenges:

Have a great one guys!!
Hugs, Tina

Magnolia Advent Calendar - Day 17

Hi there!


You are still in time to leave a comment on my Magnolia blog HERE to get a chance at winning an awesome mistery prize from Magnolia Sweden!!
How great is that???
Hurry up! 

Tina xxx

nedelja, 30. november 2014

Christmas Kitchen Tilda

Yes.. 
You're right..
This is my second post for today..

I'm not crazy..
I just have this cute bookmark that I made a few weeks ago for the Abilmente fair in Rome, and I never got the chance to show it..

I got extremely inspired by my lovely DT friend Camilla S when I saw her pictures from the Magnolia day in Boras..
She held several workshops and each lady made a lovely bookmark..
I said.. I have to make one myself..
And that's how it all started..

I have to admit that it's hard for me not to use all the gorgeous stuff I have in my drawers but how are you going to use this as a bookmark if it's covered with stuff and you can't close the book? LOL!

Enough with the babbling..
Here it is..


The image is called Christmas Kitchen Tilda and it's one of the cuties from the Waiting For Christmas Collection 2014..
I had so much fun coloring her..


I picked some heavy kraft paper for the base and added some textured white paper and this gorgeous Magnolia DP on top..
The borders are distressed and machine sewn..
There's a light touch of Gesso here and there..


I've cut out the image with my Spellbinders ovals..
There's some cheesecloth under the image and a doily under that..
And I couldn't resist.. I had to add a few pearls.. 


The image is stamped with Archival Ink on 300g Langton aquarel paper and coloured with Distress Inks..
I've used these colours:
Skin: Vintage Photo, Tattered Rose
Cheeks: Tattered Rose
Hair: Antique Linen, Walnut Stain
Dress: Victorian Velvet, Pumice Stone, Black Soot
Shoes: Walnut Stain, Pumice Stone, Black Soot
Ground: Old Paper, Pumice Stone
Background: Weathered Wood, Old Paper


Can you see all the shiny stuff around there?
Crackle Paint on the hearts, Stickles on the bow and apron, Liquid Pearls all around her..
And of course some Shabby Pink Frantage on the borders..


A hole on the top and a touch of lace and you're done..
How fun is that?

And you know what?
That's the first one for me but I can assure you it's not the last..

Hope you enjoyed!
Tina

Tilda's Town Challenge #131 - Joys Of The Season

Oh my.. Where has the time gone..
I even managed to forget to post this card I made for both the Magnolia DT Blog Hop and Tilda's Town..

A new challenge has already started and you can find it HERE.. 

And here's the card I'm talking about..


It was love at first sight..
But what can I say.. That's what happens to me every time a new collection comes out..
They are all soooo incredibly gorgeous!!!


These amazing papers are from Magnolia too..
My favourites when it comes to Christmas projects..
The ever present doily is there and so are all those gorgeous WOC and Kort & Godt flowers..


I made the corners with a mold I got on Ebay and some Fimo..
 There's some cheesecloth under those flowers and I've added a snowflake charm too..
I really like adding some brown corrugated cardboard when I'm working with reds..
And a tag is almost a must..


Here are some more flowers, a pine cone, some decorative berries and a gorgeous pin..
I've added some Twinklets Diamond Dust here and there.. Love the effect..


Yes.. This is still my favourite lace..
And another thing I love is this sweet little angel.. Made out of Fimo like the corners above..
There are lots and lots of pearls all over this card and some Gesso here and there too..
All the paper edges are distressed and machine sewn..


The image is stamped with Archival Ink on 300g Langton aquarel paper and coloured with Distress Inks..
The postmarks are from Kort & Godt..
The tiny dots around the image are made with Liquid Pearls and I've added some Stickles on all the stars..


Thanks for stopping by!
Hugs, Tina

nedelja, 9. november 2014

Embossed White Lines Technique

Hi everyone!
How are you doing?

I'm all excited cos' I'm getting ready for the Abilmente fair in Rome next week where Giada and I will be enjoying at the Magnolia booth..Yayyy!!! Can't wait..
Today I wanna simply thank you for all the excitement you've shown about the Embossed White Lines Technique I used a few months ago..

Thank you so much from the bottom of my heart!!!

I've seen so much cardmakers around the globe using this technique and I'm not just talking about Magnolia fans..
The tutorials are spreading so fast..
Happy me!!

Don't confuse this technique with the white lines that the fantastic Elise Dinolfo does..
She uses an opaque white pen.. Not the embossing powder..


But let's clear things out.. I have called it Tinchy technique a few times but I'm well aware that I haven't invented anything new..
You may remember me saying that a few months ago when I first posted the Tilda with Summer Pants..
So.. I'm not claiming it to be an invention of mine..
I just haven't seen any images coloured this way before and I thought it was funny to call it that way..
So.. No more Tinchy technique..
Call it whatever you want but never ever use this name again.. ;)

I'm still happy that you loved it and that so many of you tried it..

For those of you who still don't know what I'm talking about.. 
Here's a quick tutorial..
Only two small pics but that's all that this is about..


I use my VersaMark embossing pad and an embossing powder I've hade for ages..
I can't even find the name of it..
So..

Step 1: 
Apply the embossing ink to your stamp.. Like you would normally do with other inks..
Step 2:
Stamp the image..
Step 3:
Cover the image with your embossing powder..
Step 4:
Tap off the excess..
And if you're like me.. Remove the embossing powder from her eyes with a brush..
Otherwise you'll have some problems making them black..
Step 5:
Heat the image with a heating tool..

That's it!!
Easy, right?

Now grab your DI's, Copics, pencils or whatever you use for your coloring and enjoy!!!

Here are a few collages I made with your gorgeous images my lovely friends and followers..
Hope you don't mind..
I just love them all!!!

***collages removed***

Thanks for stopping by and thanks for your support!!
Love you all!!

Tina xxx

sobota, 8. november 2014

Tilda's Town Challenge #129 - Anything Goes

Hey guys!

I've been neglecting my Edwins for too long..
But you know what? Male cards are really not my thing..

A good friend of mine asked me to make a card for a gentleman who's celebrating his 60th Birthday..
She said: "..and no lace and no flowers!!!"..
Are you kidding me??
How am I gonna do that? LOL!

I had no choice.. 
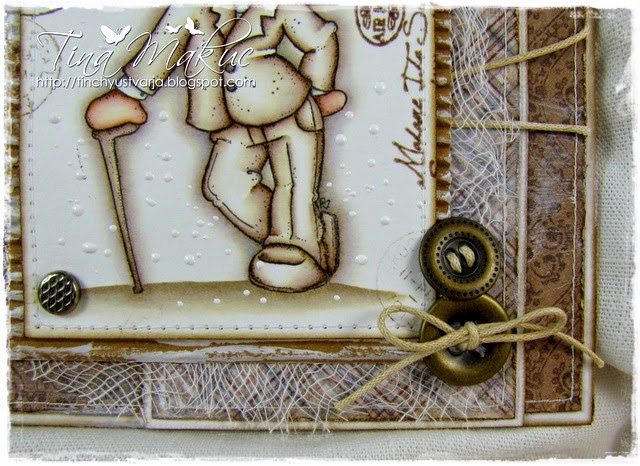
Here's my card with Edwin With Derbyhat from the Little London Collection 2013..


I've decided to use this card for Tilda's Town new challenge Anything Goes..
Here are some more details..


The papers are from Pion Design and Maja Design..
My absolute favourites when talking about designer paper..
There's a doily and some cheesecloth.. I couldn't resist..
You can also see a light bulb charm and some corrugated cardboard painted with a bit of Gesso and Picket Fence Crackle Paint..


I really wanted to keep it simle so I used two super cute bronze buttons from my stash and some thin natural cord..
I've also added two brads on the corners of the image..
The postmarks are from Kort & Godt..
The paper edges are distressed and sewn..


The image is stamped with Archival Ink on 300g aquarel paper and coloured with Distress Inks..
I've only used a few colours this time:
Pumice Stone, Weathered Wood, Vintage Photo, Tattered Rose, Black Soot, Antique Linen and Old Paper..
The dots around the image are made with Chunky White Frantage..


So.. This is my creation..

Join us for a chance to win a $10 Gift Certificate to Tilda's Town online Magnolia Store.


Tilda's Town is a most magical shop specializing in Magnolia Stamps & Cutting dies. We carry over 1,400 stamps in stock at all times & over 4,000 dies from all your favorite brands. We offer very competitive shipping rates and we ship worldwide. Visit us at Tilda's Town and live the magic.

Thanks for visiting!!

Hugs, Tina

četrtek, 6. november 2014

Magnolia Christmas Blog Hop

Hi there!

Want to win a fantastic prize directly from Magnolia Sweden??
Follow my Magnolia blog HEREhttp://tinaandmagnolia.blogspot.com/ to make sure you don't miss your chance..

Coming soon..
So.. Stay tuned..


Have a great day everyone!!!
Hugs,
Tina xxx

nedelja, 12. oktober 2014

Tilda With Summer Pants

Hey guys!
Did you miss me? 

I surely miss spending some time in my craft room and I miss all your sweet comments even more..
I know I haven't posted anything for like ages and I'm ashamed.. But I'm slowly putting all the pieces together and I'll be back on track very very soon.. Promise.. ;)
I've finally had the time to finish my notebook with Tilda With Summer Pants..
Remember my 'Tinchy Technique'? No?? Here's the link to the post..
I've seen a lot of crafters all around the globe trying this technique and I couldn't be prouder..
Thank you all so much!!!


You've probably seen the notebook on the Tilda's Town challenge Blog already..
Well.. Here are all the details..


The papers are from Maja Design.. I just love the Sofiero Collection..
The Viewmaster/Pinweel die is from Magnolia..
And so are some of the postmark stamps I used around..
The other postmarks are from Kort&Godt..


The lace and doily are from my stash..
The 'You Are Beautiful' stamp is from the Stempelglede Follow Your Heart set..


Here's a close up of the wonderful WOC and Kort&Godt flowers I used..
There's some cheesecloth under those too and I covered them with Gesso..


This fantastic charm is from my stash..
I've added a touch of Gesso on it and again some cheesecloth and a wonderful flower..
All the DP's edges are distressed using a Tim Holtz tool, inked with Walnut Stain and machine sewn..


This cutie is called Tilda With Summer Pants..
It's a stamp from the Pink Lemonade Collection 2014..
The image is stamped on 300g Langton aquarel paper and coloured with Distress Inks..
I use both the ink pads and reinkers for my colouring..
I used a regular ball pen to colour the eyes..
The small pearls around her are made with Liquid Pearls, the bigger ones are just regular self-adhesive half-pearls..

Well.. That's it guys..
Thanks for stopping by!!!
I really hope you enjoyed..

Hugs, Tina

četrtek, 21. avgust 2014

Tilda's Town Challenge #117 - Flowers On It..

Hi everyone!
I'm finally able to write this post..
I know I'm pretty late but I hope this works as a reminder..
We have a fantastic challenge running over at Tilda's Town this week..
It's really simple.. Flowers On It..


I made a gift bag for a Baby Boy this time..
I never get tired of using this one on my creations.. LOL!


I've used some blue organza ribbon for the handles..
The image was cut out using a Spellbinders Oval and I placed a matching Scalloped Oval under it..
The next layer is the cheesecloth..
And then a doily..
Some gorgeous patterned paper cut with a GoKreate die..
And again some cheesecloth and two more layers of paper..


I've used a lot of homemade embellies on this one..
The corners are made with a mold I bought on Ebay..
Then there's the frame..
And I've also made a cute little sitting angel and placed it on one of the corners of the frame..
Cute, right?


There are tons of flowers and berries all over the place.. All covered with some gesso..
And there's (of course) some beautiful cotton lace too..
I love, love, love the shabby organza trim with pearls too..
All the papers are from Maja Design..


The sentiment is from Stempelglede..
There's even a cute little pacifier laying there..
There are also some paper flowers with pearls here and there..
I made those with a Martha Stewart punch..


The image is stamped with Archival Ink on 300g Langton aquarel paper and coloured with Distress Inks..
The flourishes around the image are made with a Stempelglede stamp..
All the paper edges are distressed with some Walnut Stain and machine sewn..
I've used some Chunky White Frantage around the image and some Stickles on the wings..


You can find this and many other items for sale in my Etsy shop HERE..

Hope you can join us in this fantastic challenge..
Don't forget..
There's a fantastic prize up for grabs for one lucky random winner..


Tilda's Town is a most magical shop specializing in Magnolia Stamps & Cutting dies. We carry over 1,400 stamps in stock at all times & over 4,000 dies from all your favorite brands. We offer very competitive shipping rates and we ship worldwide. Visit us at Tilda's Town and live the magic.

Well.. I really hope you like it..
Thanks for stopping by!

Hugs, Tina